办公神器来袭 | DeepSeek 一键接入 Word,效率飞起!
宝子们,在快节奏的职场中,谁不想拥有一个能让自己工作效率直线飙升的办公神器呢?今天,我就给大家挖到宝啦!它就是 DeepSeek + Word 这对王炸组合,轻松实现 AI 助力办公,让你告别繁琐操作,开启高效办公新大门,话不多说,赶紧跟我一起来看看吧~
什么是 DeepSeek + Word ?
DeepSeek 就像一位超级聪明的 AI 助手,而 Word 是我们熟悉的办公文档编辑器。当 DeepSeek 遇上 Word ,强强联合,直接在 Word 界面里,咱们动动鼠标点一点,DeepSeek 就能超快速帮咱检索信息、精准翻译文本,还能智能生成内容,这可太方便啦,妈妈再也不用担心我在不同软件间来回切换啦,办公效率想不高都难!
接入前的准备
1. 获取 API key :
宝子们,这步很关键哦,先参照教程去获取 API key,拿到 “钥匙” 才能开启后续功能呢。博主这里使用的是腾讯的Deepseek API服务(免费使用至2025年2月25日哦,后续可自行购买)
1.1 打开链接https://curl.qcloud.com/GlPIXCIi ->选择产品体验->调用DeepSeek API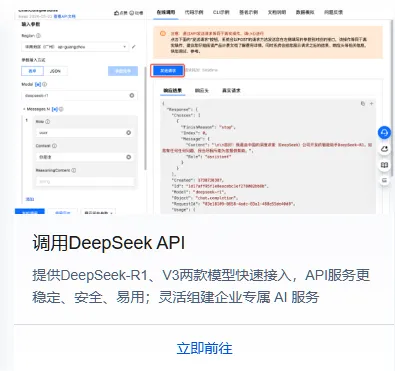
1.2 根据教程创建API_KEY
博主选择的是”Openai兼容协议接口”, 后续可以切换成其他家API服务。
申请API文档参考https://curl.qcloud.com/N0gdpW0X
1.3 拿到属于自己的崭新的Deepseek API KEY, 记住他,后面要用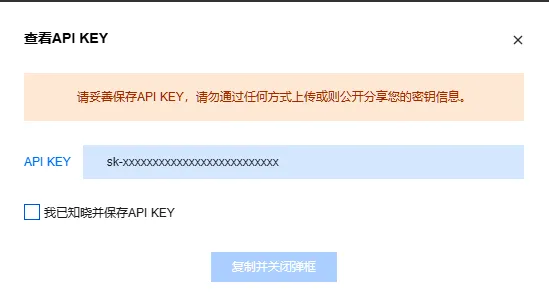
2. 新建 Word 文档 :
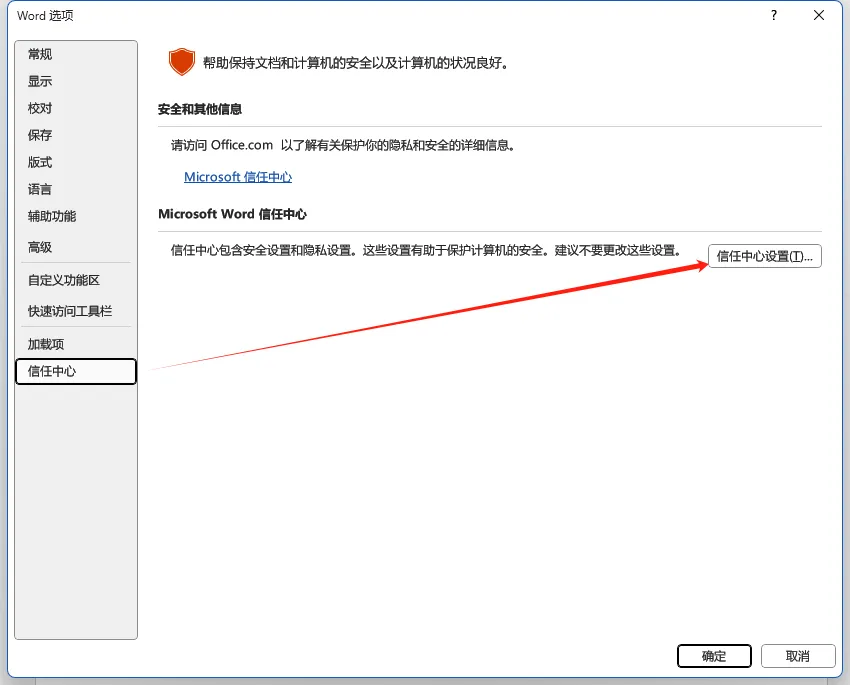
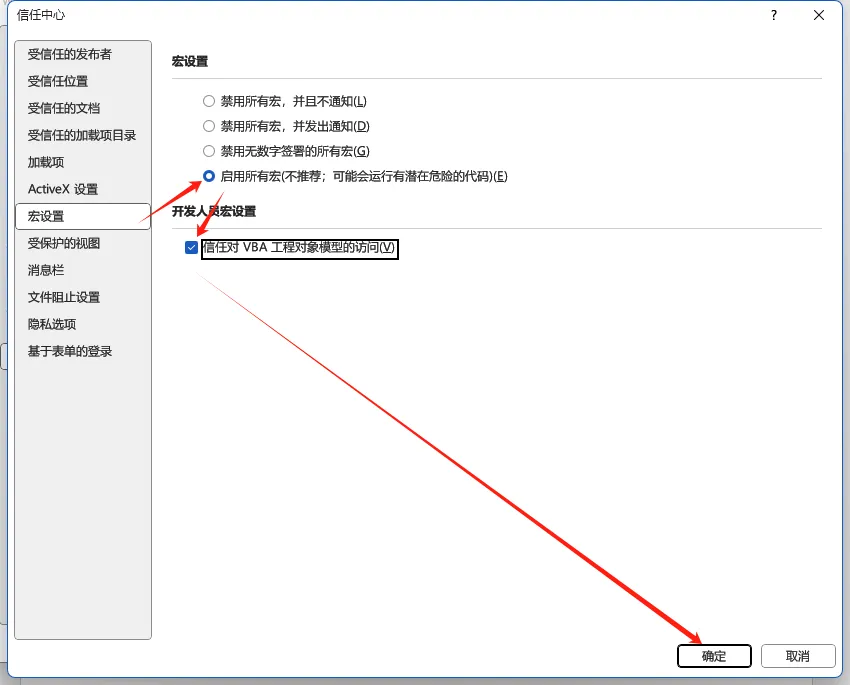
打开 Word ,点击左上角 “文件”,选择 “选项”,接着点击 “自定义功能区”,勾选 “开发者工具”,再点击 “信任中心” - “信任中心设置”,选中 “启用所有宏” 与 “信任对 VBA……”,点击确定,这一步是为了让后续操作能顺利进行哦。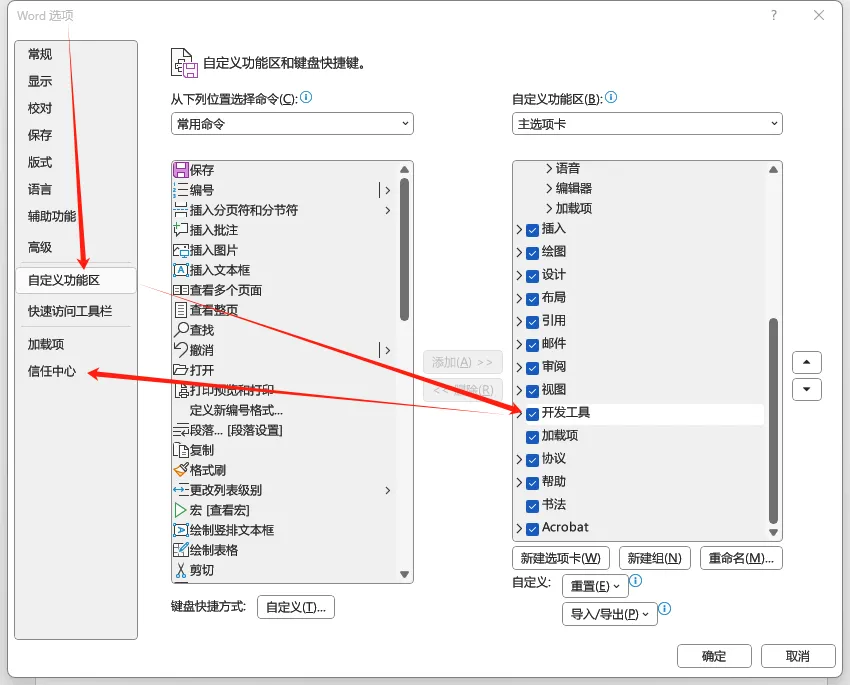
接入步骤详解
1. 插入模块写代码 :
点击 “开发者工具”,再点击 “Visual Basic”,弹出窗口后,点击 “插入” - “模块”,把下面这段代码复制到编辑区,记得把 “替换为你的 API key” 换成咱自己刚拿到的 API key 哦。完成后,可直接关闭弹窗。然后记得保存哦,保存万后,把Visual Basic窗口也关闭了哦!
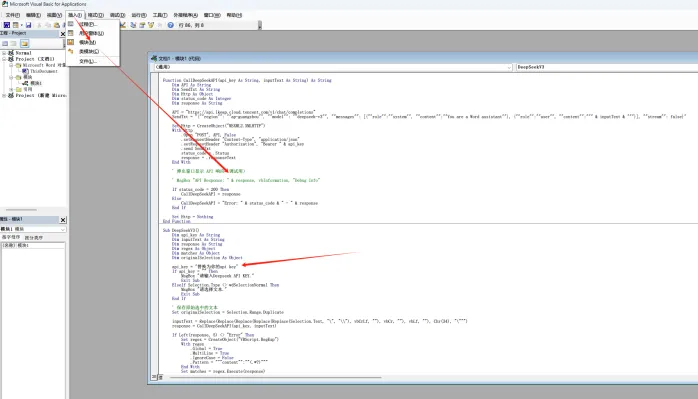
Function CallDeepSeekAPI(api_key As String, inputText As String) As StringDim API As StringDim SendTxt As StringDim Http As ObjectDim status_code As IntegerDim response As StringAPI = "https://api.lkeap.cloud.tencent.com/v1/chat/completions"SendTxt = "{""region"": ""ap-guangzhou"", ""model"": ""deepseek-v3"", ""messages"": [{""role"":""system"", ""content"":""You are a Word assistant""}, {""role"":""user"", ""content"":""" & inputText & """}], ""stream"": false}"Set Http = CreateObject("MSXML2.XMLHTTP")With Http.Open "POST", API, False.setRequestHeader "Content-Type", "application/json".setRequestHeader "Authorization", "Bearer " & api_key.send SendTxtstatus_code = .Statusresponse = .responseTextEnd With' 弹出窗口显示 API 响应(调试用)' MsgBox "API Response: " & response, vbInformation, "Debug Info"If status_code = 200 ThenCallDeepSeekAPI = responseElseCallDeepSeekAPI = "Error: " & status_code & " - " & responseEnd IfSet Http = NothingEnd FunctionSub DeepSeekV3()Dim api_key As StringDim inputText As StringDim response As StringDim regex As ObjectDim matches As ObjectDim originalSelection As Objectapi_key = "替换为你的api key"If api_key = "" ThenMsgBox "请输入腾讯云DeepSeek模型API KEY."Exit SubElseIf Selection.Type <> wdSelectionNormal ThenMsgBox "请先选择文本再操作."Exit SubEnd If' 保存原始选中的文本范围Set originalSelection = Selection.Range.DuplicateinputText = Replace(Replace(Replace(Replace(Replace(Selection.text, "\", "\\\"), vbCrLf, ""), vbCr, ""), vbLf, ""), Chr(34), "\\""")response = CallDeepSeekAPI(api_key, inputText)If Left(response, 5) <> "Error" ThenSet regex = CreateObject("VBScript.RegExp")With regex.Global = True.MultiLine = True.IgnoreCase = False' 修改正则表达式以匹配 content 内容.Pattern = """choices"":\[\{""index"":\d+,""message"":{""role"":""assistant"",""content"":""(.*?)""}\,""finish_reason"":""stop""}\]"End WithSet matches = regex.Execute(response)If matches.Count > 0 Thenresponse = matches(0).SubMatches(0)response = Replace(response, "\""", Chr(34)) ' 处理引号' 取消选中原始文本,移动到选中文本的末尾Selection.Collapse Direction:=wdCollapseEnd' 插入一个段落分隔符,换行Selection.TypeParagraph' 插入模型生成的内容到新行Selection.TypeText text:=response' 移动光标到最后,方便用户继续编辑或查看生成的内容Selection.MoveEnd Unit:=wdCharacter, Count:=0ElseMsgBox "格式化API响应失败,请检查下代码BUG吧!.", vbExclamationEnd IfElseMsgBox response, vbCriticalEnd IfEnd Sub
2. 设置功能区与宏 :
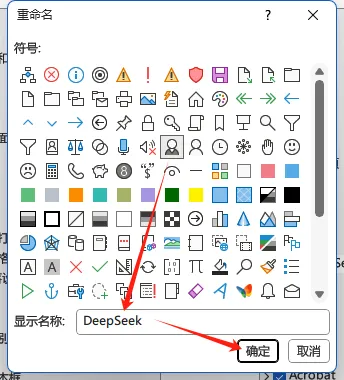
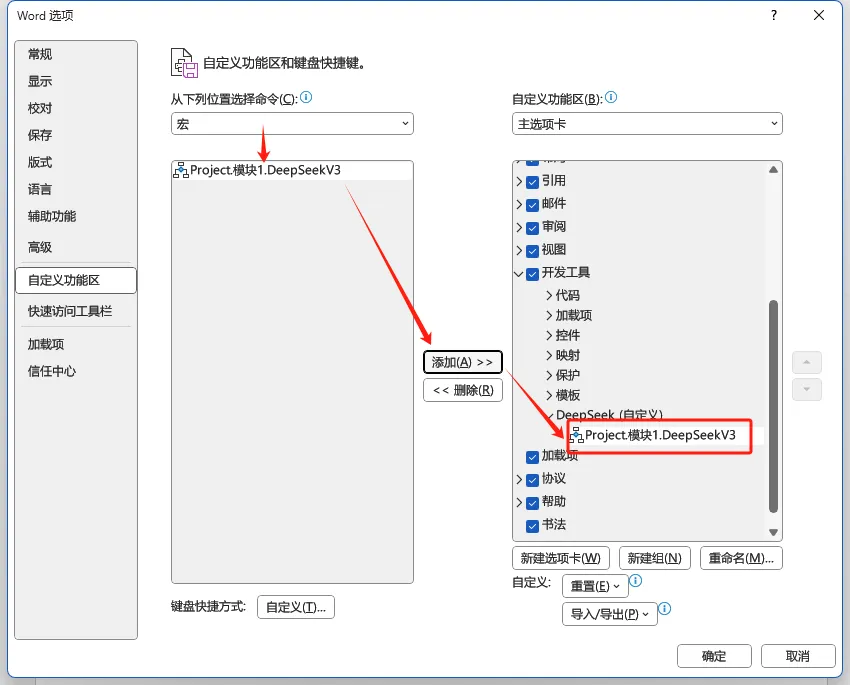
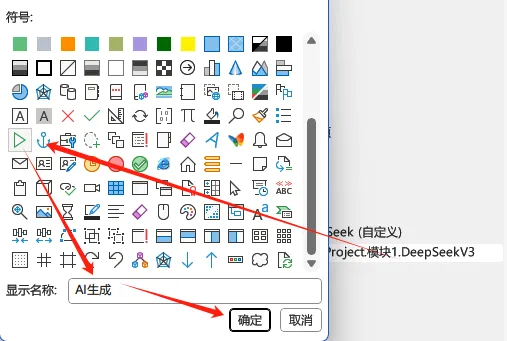
点击 “文件” - “选项” - “自定义功能区”,右键 “开发工具”,点击 “添加新组”,重命名为 “DeepSeek”,选择心仪图标。在添加的新建组点击右键,选择 “宏”,找到 “DeepSeekV3”,选中后点击 “添加”,再右键点击重命名,选择开始符号作为图标,并重命名为 “AI生成”,最后点击确定。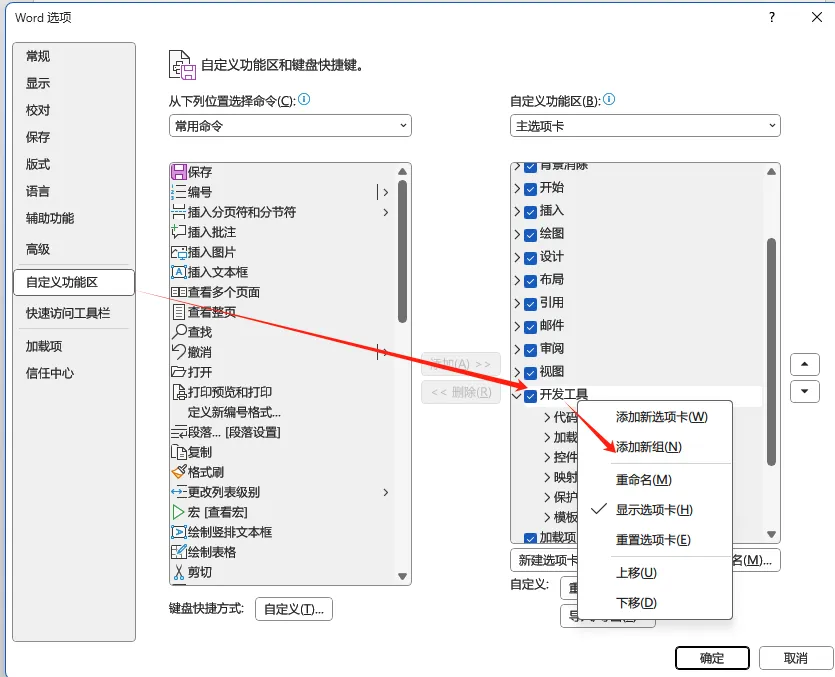
使用体验
接入完成后,咱在 Word 里选中文字,点击 “AI生成”,就能直接把选中的文本发送给大模型,它会按照咱选中的文本做出响应,比如把中文翻译成英文,或者根据内容生成相关拓展,整个过程超流畅,办公效率瞬间就提上来了,真的爱了爱了。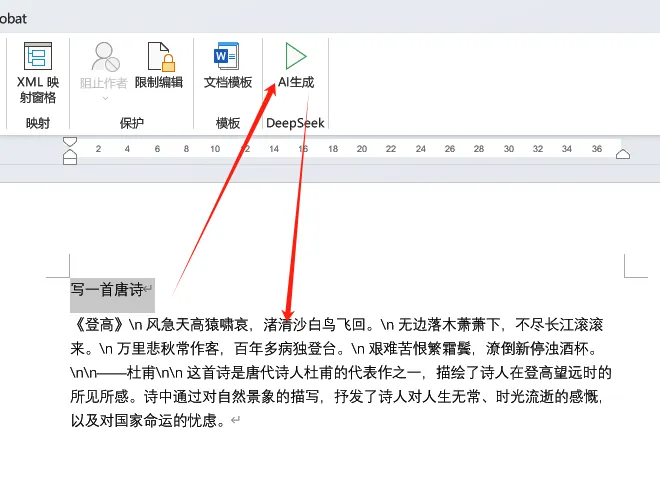
宝子们,DeepSeek + Word 这么实用的办公组合,赶紧学起来用起来吧,相信我,用了之后你会发现办公原来可以这么轻松愉快,快去试试,开启你的高效办公之旅吧!

